
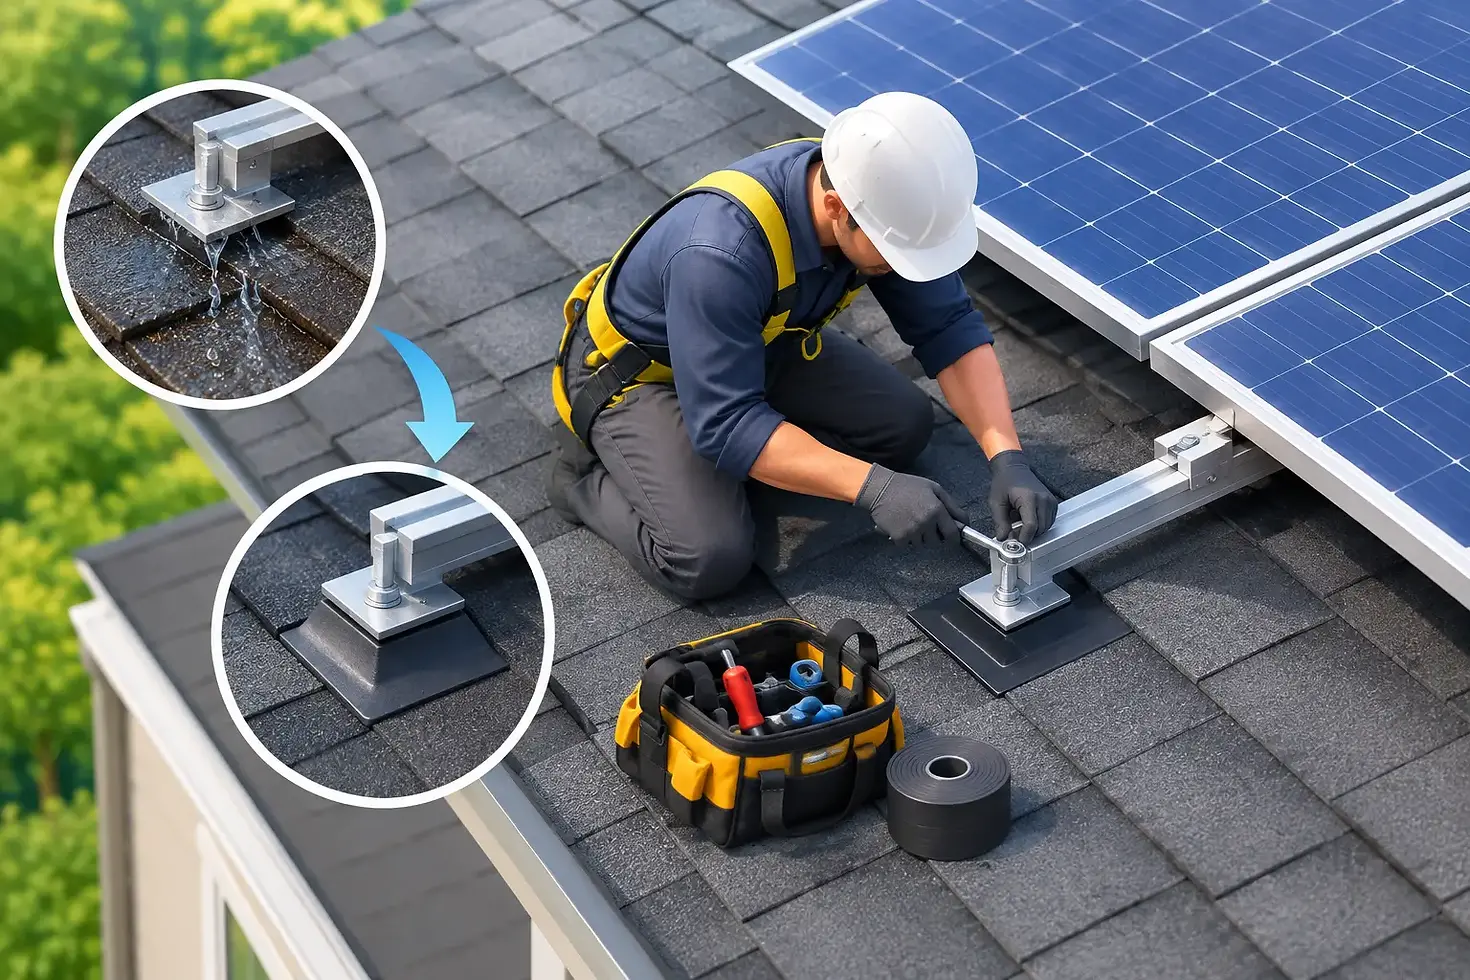
Solar Mounting Repair Case Study: Stop Roof Leaks

A solar mounting repair case study is most useful when it answers the question homeowners are really asking: can the system be fixed without creating a bigger problem for the roof? In this representative Utah project, the answer was yes, but only because the inspection went beyond the visible loose hardware and addressed the roof penetrations underneath it.
The homeowner called after noticing a small water stain near an upstairs ceiling corner following a heavy storm. Their solar system was still producing power, so the issue did not look urgent at first. A closer look from the ground showed one panel sitting slightly out of alignment with the row. That was enough to warrant a professional inspection before another storm turned a minor mounting concern into damaged sheathing, insulation, or drywall.
The Problem: A Loose Mount Was Not the Whole Story
The system had been installed several years earlier on an asphalt-shingle roof. During the on-roof evaluation, the technician found a shifted rail connection and mounting hardware that had lost its secure fit. The panel itself was intact, and the electrical wiring showed no immediate damage. However, the bigger concern was the flashing at the affected roof attachment.
Solar mounts are designed to transfer the weight of the array safely into the roof framing while keeping water out of the home. If a lag bolt misses solid framing, hardware is not properly torqued, or flashing is compromised during an earlier installation, water can work beneath the roofing materials. The leak may not appear directly below the solar panel. Water often travels along decking or framing before it becomes visible inside.
This is why a quick patch around a bracket is rarely the gold standard. Caulk may slow water for a while, but it does not confirm that the mount is structurally sound, that the rail is correctly aligned, or that the roof penetration is protected for the long term.
How the Solar Mounting Repair Case Study Was Handled
The repair plan began with safe access, a production check, and a careful review of the affected section of the array. The team documented panel positions, rail layout, wire routing, and existing roof conditions before removing anything. That preparation matters. A mounting repair is not just a roofing task and not just a solar task. It requires both disciplines to protect the system and the home.
Step 1: Isolate and Inspect the Affected Area
The affected panel was safely disconnected according to proper procedures and removed with the surrounding hardware as needed for access. With the rail lifted, the team could inspect the penetration, shingles, flashing, and roof decking conditions instead of guessing from the surface.
The finding was clear: the original attachment location was not providing the level of secure structural connection the system needed. The flashing also required replacement. Fortunately, the issue was caught before extensive decking damage developed.
Step 2: Correct the Attachment, Not Just the Symptom
The repair required relocating the attachment to a verified framing point and installing a properly flashed mount compatible with the roof system. The surrounding shingles were handled carefully to preserve the roof surface and create proper water shedding around the new penetration.
This is where shortcuts create expensive callbacks. The goal is not simply to make the rail look straight again. The goal is to create a secure load path into the structure and a weather-tight roof detail that holds up through snow, wind, summer heat, and seasonal expansion.
The rail was then realigned and secured using the correct hardware. Every connection in the repaired area was checked for fit and torque. The team also inspected adjacent mounts because a single shifted component can point to movement or installation inconsistencies nearby.
Step 3: Reinstall Panels and Verify System Performance
Once the roof attachment and rail were corrected, the panel was reinstalled. Wiring was returned to its proper routing and secured so it would not rub against the roof or hang where wind could cause wear over time. The team inspected clamps, bonding components, and visible conductors before completing the electrical checks.
After the system was placed back into service, production and monitoring were reviewed to confirm normal operation. The homeowner received a clear explanation of what failed, what was repaired, and what conditions to watch for in the future.
That communication is part of the repair. Homeowners should not be left with a vague statement that a bracket was tightened. They deserve to know whether the roof penetration was addressed, whether nearby mounts were inspected, and whether the solar system was tested after work was complete.
Why This Repair Protected More Than Production
A loose mount can affect more than a single panel. Rails distribute weight across the array, so misalignment can add stress to clamps, modules, and neighboring attachments. In high winds, a system with compromised mounting may be exposed to forces it was not designed to handle in its current condition.
The roof risk is just as serious. Small leaks can remain hidden for months, especially when water only enters during wind-driven rain or melting snow. By the time staining appears indoors, the area may already have moisture damage that requires roofing and interior repairs.
In this case, the homeowner avoided a larger repair because the problem was investigated early. The panel was saved, the rail was restored, the penetration was properly flashed, and the array returned to normal operation. Just as important, the homeowner had confidence that the repair addressed the cause rather than covering it up.
What Homeowners Should Watch For
Mounting issues are not always obvious, but a few signs deserve prompt attention. A panel that appears uneven, a visible gap between a rail and roof, loose hardware, rattling during wind, or new staining in the attic or ceiling near the array should not be ignored.
Changes in energy production can also matter, although lower output does not automatically mean a mounting problem. Dirt buildup, shading, inverter issues, damaged wiring, and monitoring errors can produce similar symptoms. That is why a diagnostic inspection is more valuable than assuming the cause.
Roof replacement is another important moment to inspect mounts. Solar panels generally need professional removal and reinstall before roofing work begins. Reusing components may be appropriate when they are in good condition, but that depends on the age of the equipment, code requirements, roof type, and what the inspection reveals. A qualified solar specialist can help homeowners make that decision without risking the roof warranty or system performance.
The Repair Standard That Makes the Difference
Good solar mounting repair is measured by more than how the array looks when the crew leaves. It should protect the roof, restore structural support, preserve electrical safety, and confirm that the system is operating as expected.
For homeowners, the practical takeaway is simple: do not wait for a small mount issue to become a roof leak or a larger system problem. NEX Solar approaches repairs with the same attention to detail required for solar removal and reinstall work, because your roof and your solar investment deserve to be protected together.
If something looks off, take a photo from a safe distance, check your monitoring for unusual changes, and schedule a professional inspection before the next major weather event. Early action gives you more repair options and a better chance of keeping the fix straightforward.


Comments